When you're not at home, are you sometimes unable to reach certain websites or content that you normally access from home? Would you like to access content from other regions? Use the Newbound protocol to tunnel proxy requests to your own personal proxy server! Either make two units and leave one at home, or make one unit and connect it to an EC2 instance in Amazon's cloud. We'll show you how! This unit is also available for sale at
http://proxybox.io.
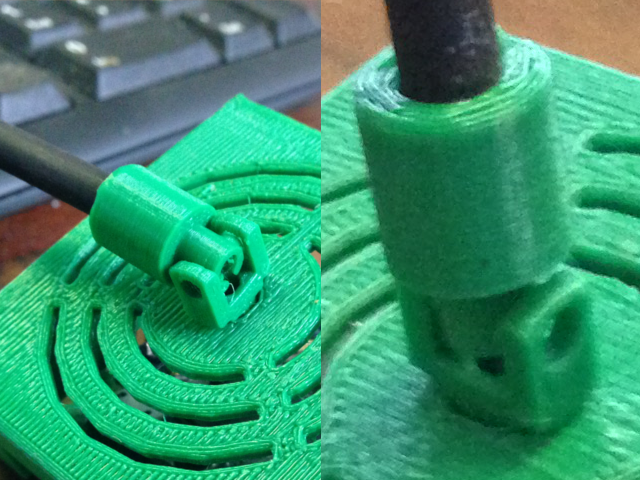
Optional Antenna Pivot
Assembly
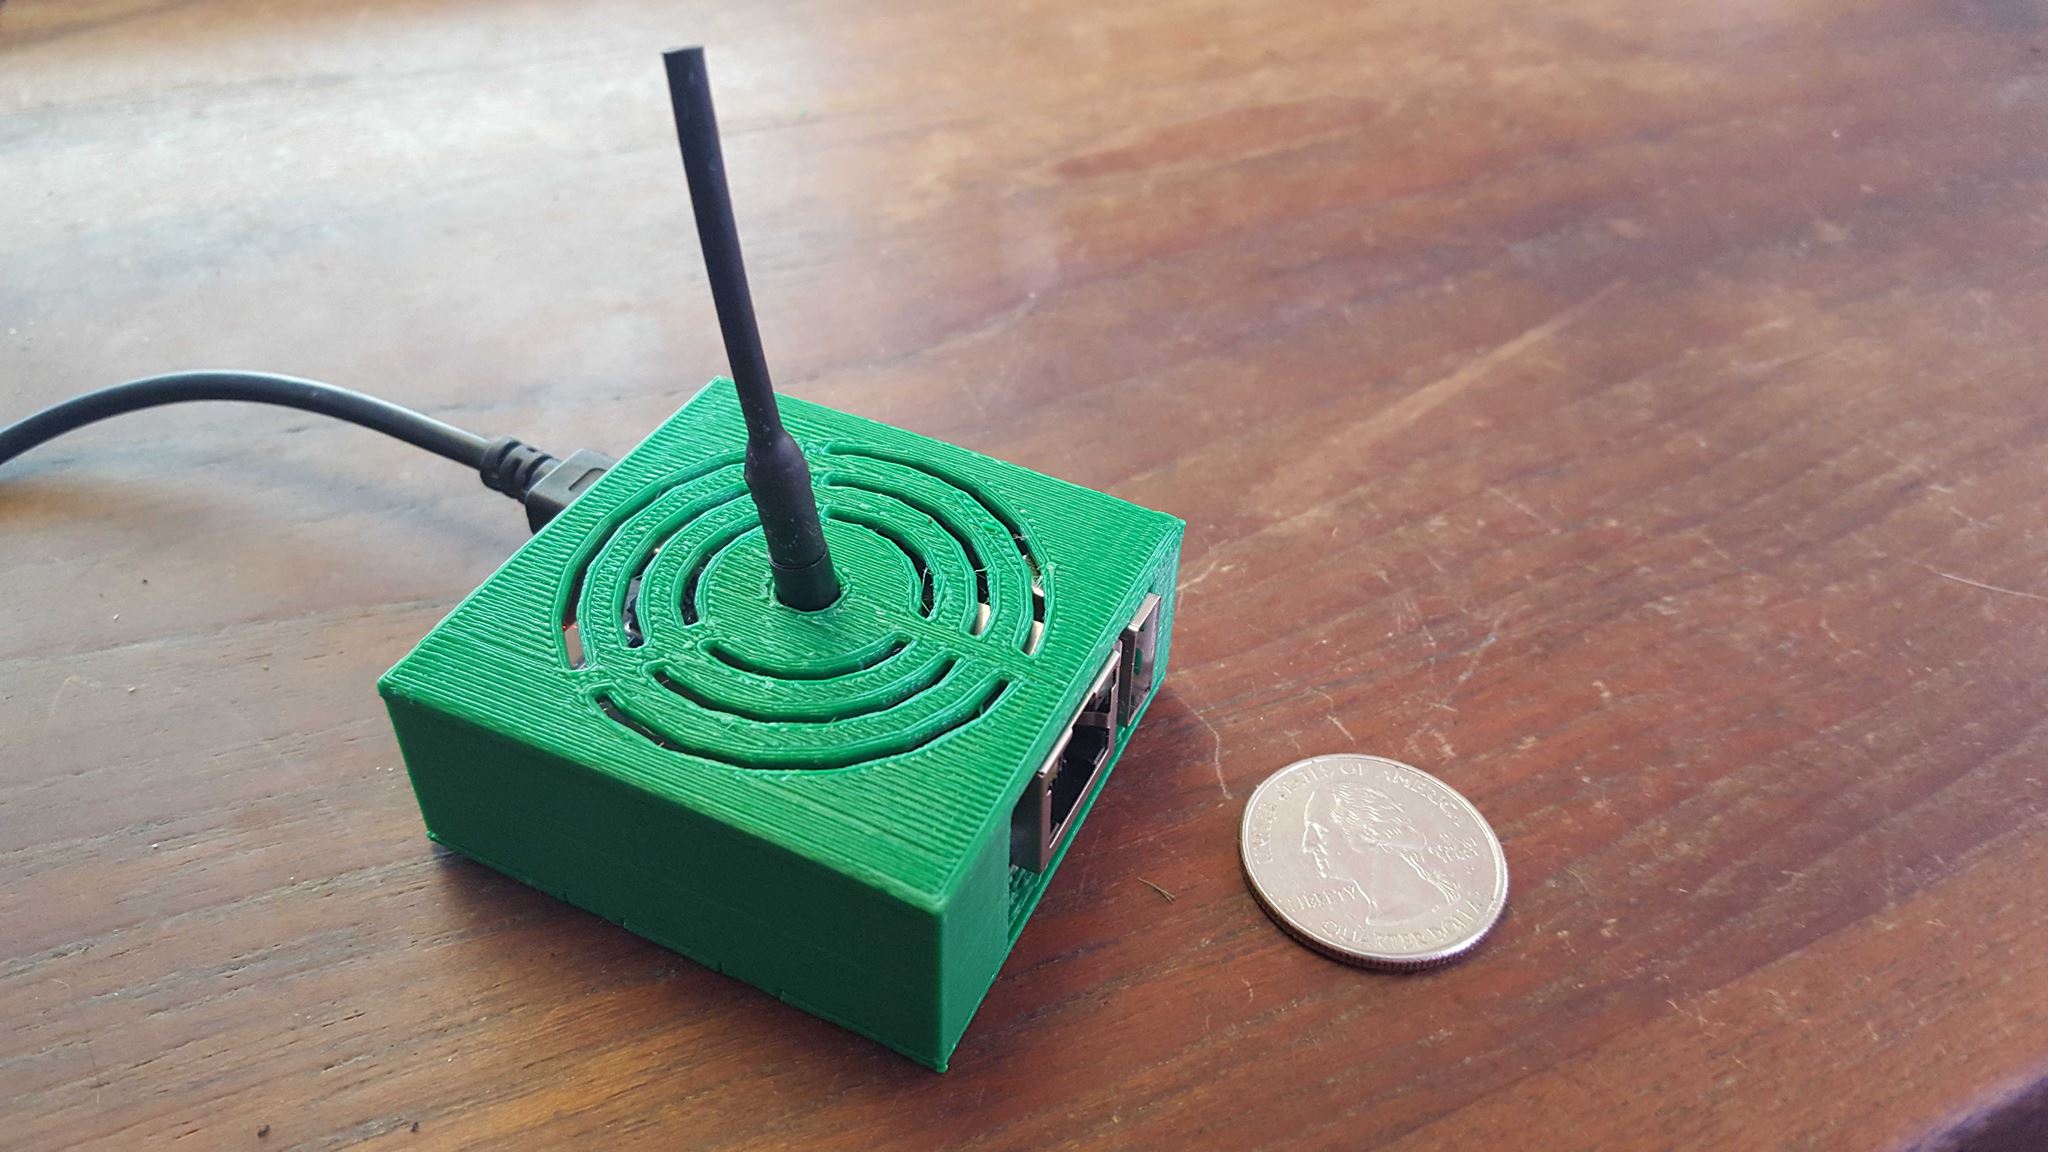
The unit has four main hardware components and a printable case. Links for hardware and 3D printed parts are provided below.
Step 1: Print out the parts for the case. Make sure to clean the pins on the bottom part well as they snap off easily enough already.
Step 2: Place the Orange Pi Zero on the bottom part with the ethernet port facing the longer ridge. Line up the pins with the holes in the pi and gently press down all four corners in unison until the board is securely mounted.
Step 3: Thread the antenna through the hole in the top part and pull through until only a centimeter is still inside the unit.
Step 4: Snap the top part in place gently but firmly. A touch of superglue on all four tabs will keep the unit from coming apart.
Software Setup
The ProxyBox uses Newbound's Portforwarding app to listen on port 3128 and forward your requests to a remote proxy server over the Newbound protocol.
ProxyBox Setup
Step 1: Download and install on your SD card the latest Debian Server operating system for the Orange Pi Zero from Armbian: https://www.armbian.com/orange-pi-zero/
Step 2: Log in to the Orange Pi Zero as root.
Step 3: Update and upgrade the device
apt-get update
apt-get dist-upgrade
Step 4: Install Open Source software
apt-get install zip openjdk-8-jdk -y
Step 5: Install Newbound software
cd /root
wget https://www.newbound.com/metabot/src.zip
mkdir Newbound
mv src.zip Newbound/Newbound.zip
cd Newbound
unzip Newbound.zip
chmod a+x newboundnetwork.sh
Step 6: Create a new startup file at /etc/init.d/newbound with the following contents:
#!/bin/sh
### BEGIN INIT INFO
# Provides:          newboundnetwork
# Required-Start:    $local_fs $remote_fs $network $syslog
# Required-Stop:     $local_fs $remote_fs $network $syslog
# Default-Start:     2 3 4 5
# Default-Stop:      0 1 6
# X-Interactive:     true
# Short-Description: Start/stop newboundnetwork server
### END INIT INFO

case $1 in
    start)
        if [ -f /root/Newbound/pid ]; then
            PID=$(cat /root/Newbound/pid);
            echo "Stopping newboundnetwork ..."
            kill $PID;
            echo "Newbound Network stopped ..."
            rm /root/Newbound/pid
        fi

        echo "Starting newboundnetwork ..."
        if [ ! -f /root/Newbound/pid ]; then
            cd /root/Newbound/src
            mkdir ../bin
            javac -d ../bin/ Startup.java
            nohup java -cp ../bin Startup 2>> /dev/null >> /dev/null &
            echo $! > /root/Newbound/pid
            echo "Newbound Network started ..."
        else
            echo "Newbound Network is already running ..."
        fi
    ;;
    stop)
        if [ -f /root/Newbound/pid ]; then
            PID=$(cat /root/Newbound/pid);
            echo "Stopping newboundnetwork ..."
            kill $PID;
            echo "Newbound Network stopped ..."
            rm /root/Newbound/pid
        else
            echo "Newbound Network is not running ..."
        fi
    ;;
    restart)
        if [ -f /root/Newbound/pid ]; then
            PID=$(cat /root/Newbound/pid);
            echo "Stopping newboundnetwork ...";
            kill $PID;
            echo "Newbound Network stopped ...";
            rm /root/Newbound/pid

            echo "Starting newboundnetwork ..."
            cd /root/Newbound/src
            mkdir ../bin
            javac -d ../bin/ Startup.java
            nohup java -cp ../bin Startup 2>> /dev/null >> /dev/null &
            echo $! > /root/Newbound/pid
            echo "Newbound Network started ..."
        else
            echo "Newbound Network is not running ..."
        fi
    ;;
esac
Step 7. Activate your new startup file
chmod 755 /etc/init.d/newbound
update-rc.d newbound defaults
service newbound start
Remote Proxy Setup
Step 1: Set up a second unit or an Amazon EC2 instance using steps 2-7 as outlined above. For an Amazon EC2 instance, you will want to modify the Security Group settings to allow your computer to connect to ports 22 and 5773 over TCP. You will also want to look up that instance's Peer Bot port and allow TCP and UDP access to that port from anywhere. Once the Newbound software is running, your Peer Bot port will be stored in /root/Newbound/runtime/peerbot/botd.properties.
Step 2: Install Open Source software
apt-get install squid -y
Newbound Network Setup
Step 1: Log into the Newbound Software running on the proxy server.
Step 2: Use the MetaBot app to install and activate the Port Forwarding app.
Step 3: Restart the Newbound software on the proxy server.
service newbound restart
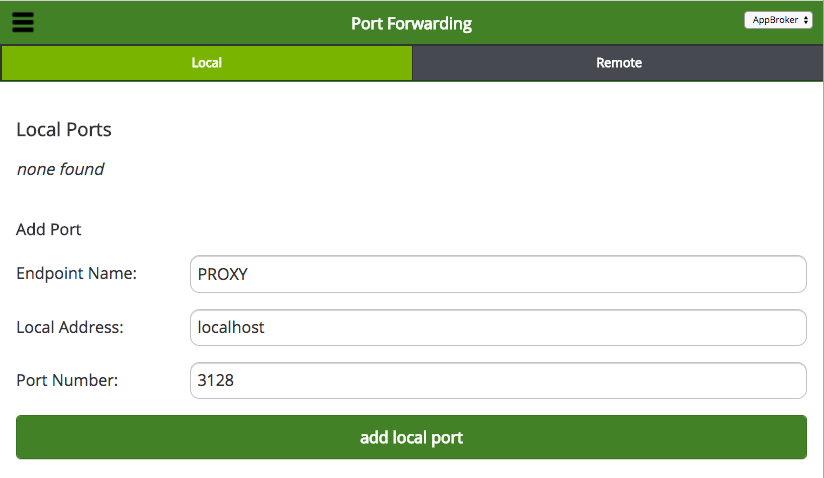
Step 4: Run the new Port Fowarding app and use it to share local port 3128.
Step 5: Run the Peer Bot app and use it to connect to your Proxy Box.
Step 6: Run the Security Bot app and use it to add your Proxy Box to the "portforward" group.
Step 7: Log into the Newbound Software running on the ProxyBox.
Step 8: Use the MetaBot app to install and activate the Port Forwarding app.
Step 9: Restart the Newbound software on the ProxyBox.
service newbound restart
Step 10: Run the new Port Fowarding app and use it to share remote port 3128 from your proxy server.
Congratulations... Your Proxy Box is ready to tunnel!
Additional Documentation